

With a little DIY magic, that blower fan can be repurposed into a powerful standalone fan, perfect for home or garage use. Converting a furnace fan into a standalone fan is a relatively straightforward project that can save you money compared to buying a new one. Additionally, repurposing the fan allows you to make the most of its capabilities, especially if it was part of a system designed for running the furnace fan continuously in winter.
Giving it a new life reduces waste and contributes to a more sustainable and cost-effective approach to home comfort. So, before discarding that old furnace blower fan, consider the potential for a budget-friendly and eco-friendly cooling solution.
Converting a furnace blower fan into a standalone fan involves a few key steps:
- Removing the fan from the furnace
- Attaching a suitable fan blade
- Wiring up an independent power source
- Mounting the fan in the desired location
In this article, I’ll walk through the process step-by-step. I’ll also provide tips on selecting the right fan blade and power source to optimize airflow and performance. Let’s get started!
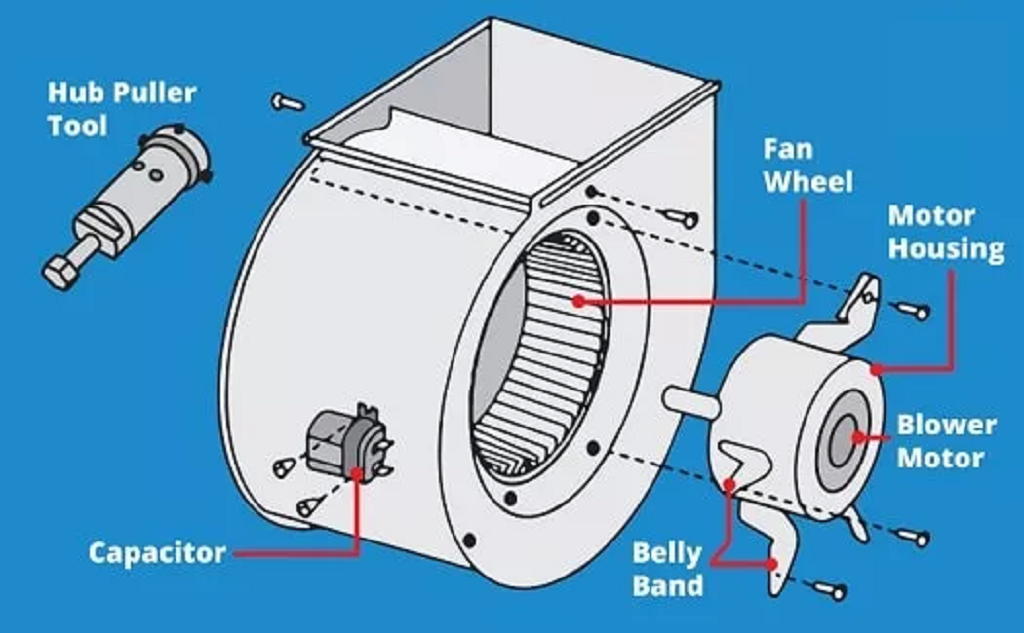
Step 1: Removing the Blower Fan from the Furnace
The first step is extracting the blower fan from the furnace itself. Here’s a quick rundown of how to remove it:
Shut off power to the furnace
Safety first! Locate the furnace power switch or the circuit breaker that controls the furnace. Turn it off to avoid being shocked when working on the wiring of the blower fan.
Unplug and label wiring connections.
The blower fan will have multiple wiring connections to the furnace control board. Carefully disconnect each plug or terminal connection. Use small pieces of tape to label each wire for easy reassembly later if needed.
Remove mounting nuts/screws.
There will likely be 4-8 mounting nuts or screws securing the blower fan assembly to the furnace housing. Remove them using the appropriate wrench or screwdriver. Be prepared to support the weight of the fan as the final screws come loose.
Extract the fan and motor.
With all fasteners removed, you can now slide out the blower fan and attached motor as one unit. Maneuver it slowly out of the furnace cabinet. Keep the wiring harness intact.
And that’s it! With the blower fan assembly removed you’re ready to move on to converting it into a stand-alone fan.
Step 2: Choosing and Attaching the Fan Blade
Here comes the fun part – picking a fan blade design and mounting it up. Here are a few key tips:
- Measure the shaft diameter on the blower motor to ensure blade compatibility
- Consider airflow efficiency vs. aesthetics when selecting a blade style
- Use set screws or hose clamps to fasten the blade to the shaft securely
Squirrel cage and paddle blade design work best for high airflow. Curved blades, like a window fan, balance airflow and low noise. For a cool vintage look, consider stainless steel fan blades.
Install the blade according to the manufacturer’s instructions. Tighten all fasteners securely. Spin the blade by hand to ensure proper clearance inside the fan shroud. Now your upcycled furnace blower is starting to take shape!
Step 3: Wiring the Fan Motor
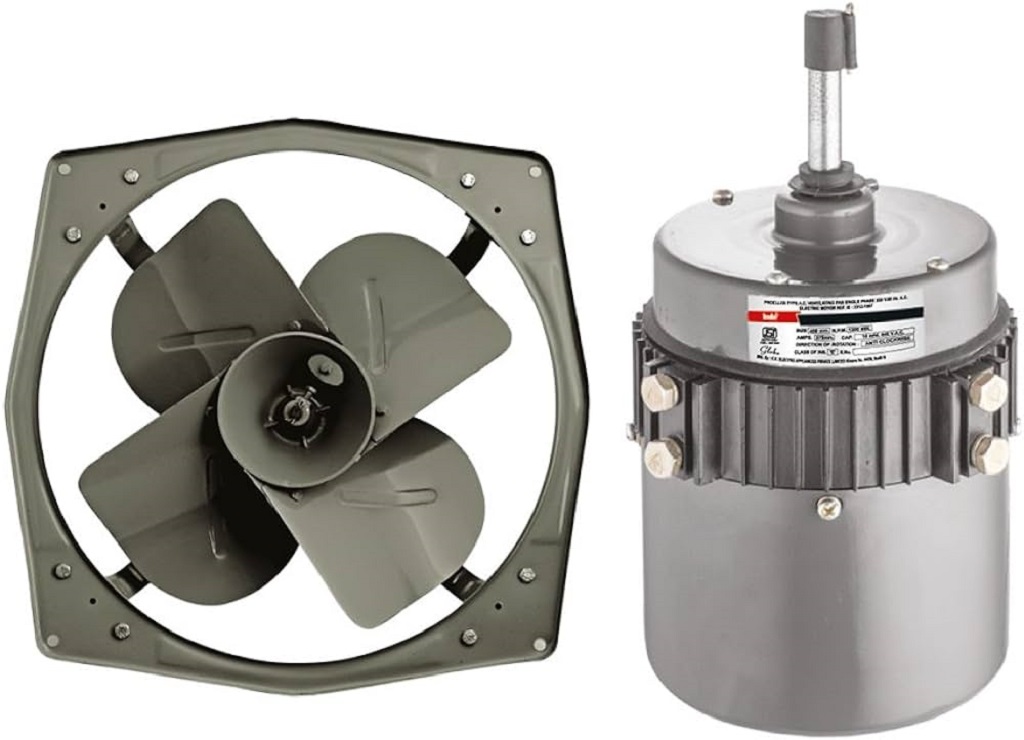
With the blade attached, it’s time to wire up the motor to be powered independently of the furnace. Here are a couple of options for wiring it up:
Option 1: Flexible extension cord
Attach a standard extension cord to the existing motor wiring harness for a quick and easy wiring solution. Cut the female end off the extension cord, giving you a maximum length to work with. Use wire nuts to connect the extension cord’s hot, neutral, and ground wires to the corresponding wires on the blower motor. Add electrical tape around each joint for insulation. This creates a plug-and-play power source to run the fan into any nearby outlet.
Option 2: Hardwire to switch
For a more permanent installation, you can hardwire the blower motor directly to a wall switch. This involves cutting the wiring harness connector off the motor to access the bare wire leads. Run these through the conduit to a nearby electrical box. Use wire nuts to connect the line, neutral, and ground, and switch legs per local electrical code. This allows you to turn the standalone fan on and off using a wall switch like a ceiling fan or light fixture.
Either wiring method works great! Just be sure to size your wiring appropriately for the amperage draw of the blower motor. An electrician can help you determine this if needed.
Step 4: Mounting the Fan Assembly
The final step is mounting the fan in its new standalone configuration. Here are some ideas:
Ceiling mount
Use a threaded rod or chain to hang the fan assembly from ceiling joists, similar to a ceiling fan. This keeps it up and out of the way. Make sure to secure any hanging hardware tightly to support the fan weight.
Wall mount
Build a simple bracket or platform to mount the fan directly to a wall or post. Position it to blow air horizontally across whatever space needs cooling off.
Floor mount
Use an old speaker stand, small table, or saw horses to create a floor-standing fan rig. Angle it upwards to circulate air around the room. Ensure the base is sturdy enough to handle the force of the fan.
Garage door mount
Install a hinged bracket to allow the fan to mount to a raised garage door when needed for cooling or ventilation. Swing it out of the way when done. This is great for workshops or hobby spaces.
Use four bolts or lag screws to fasten the blower assembly to the mounting solution securely. Now your DIY upcycled blower fan is ready to keep you cool wherever it’s installed!
Tips for Optimizing Airflow
To maximize the cooling power of your repurposed blower fan, keep these airflow optimization tips in mind:
- Minimize turns or bends in the ducting leading to the fan inlet
- Ensure at least 12-18 inches of clearance in front of the fan outlet
- Use smooth metal ducting rather than ribbed plastic flex ducting
- Maintain a straight duct run for several feet if possible
- Seal ducting thoroughly with aluminum tape to prevent air leaks
- Angle fan to blow air across the room rather than straight out
Every foot of smooth, gently bending ductwork helps airflow. So, the longer the duct runs to and from the fan, the better. You can tune the fan performance with some tweaking and experimenting to give you a nice cooling breeze!
Safety Considerations
While this is a fairly straightforward DIY project, there are a few important safety considerations to keep in mind:
- Use caution when working inside a furnace – wear protective gear and watch for sharp edges
- Double check all electrical connections – poor wiring can cause shock or fire hazard
- Secure fan and wiring properly – loose components can vibrate and disconnect
- Guard all moving parts – the spinning fan blade poses a serious finger/hand hazard
- Ensure adequate airflow – do not restrict the fan inlet or outlet in any way
- Monitor the fan while running – abnormal noise or excessive vibration are warning signs
- Clean regularly – dust buildup on the blades can throw off balance
If you work carefully, mind the wiring, and keep clear of the spinning fan blade, you should be able to power up and enjoy your upcycled blower fan creation safely!
Frequently Asked Questions
1. What size furnace fan will work best?
Aim for a fan in the range of 16-18 inches in diameter – this provides enough power for good airflow while still being manageable size. Smaller 12-inch fans may not move enough air volume.
2. What should I do if the fan wobbles or vibrates?
Double-check that the blade is centered on the shaft and secured tightly. Also, ensure the entire fan assembly is securely mounted. Try adjusting one fan mounting hole slightly to pivot the fan alignment.
3. How can I determine the wiring diagram for the motor?
If the motor has no wiring diagram, use an ohm meter to figure out wiring pairs by checking the resistance between leads. Or search the motor model number online to find a wiring diagram match.
4. Is it possible to reverse the fan direction?
Yes, these shaded pole motors are reversible by switching the wiring pairs for the start and run windings. Swap the reversed leads to switch direction again.
5. What should I do if the fan motor won’t start up?
Check all wiring connections and fuses/breakers. Inspect the motor wiring for damage. If it still doesn’t run, the motor winding or capacitor may need replacement. Test voltage at the motor leads.
Conclusion
Converting an old furnace blower fan into a standalone fan is a great way to save money and reduce waste. With some basic mechanical skills and electrical knowledge, the process is very doable. Mount it wherever you need a high-velocity cooling breeze! Just be sure to work safely and follow standard wiring practices. Get creative with designing fun shrouds and mounting solutions too. That old furnace fan will make an awesome upcycled appliance with a bit of imagination.
Repurposing a blower fan for your kitchen exhaust offers an excellent entry-level DIY electrical and mechanical project, providing a cost-effective solution for acquiring a powerful fan with significant airflow capability, thanks to the sturdy construction of furnace blower motors.
