Is your dishwasher air gap leaking? Don’t worry, it’s a common issue that can be easily fixed. In this article, we’ll guide you through the process of fixing a leaking dishwasher air gap step by step. We’ll explain what an air gap is, discuss the signs and causes of a dishwasher air gap leaking with no clog, and provide you with practical solutions to resolve the problem. So let’s dive in and get your dishwasher back to its optimal performance!
Understanding the Dishwasher Air Gap Leaking No Clog
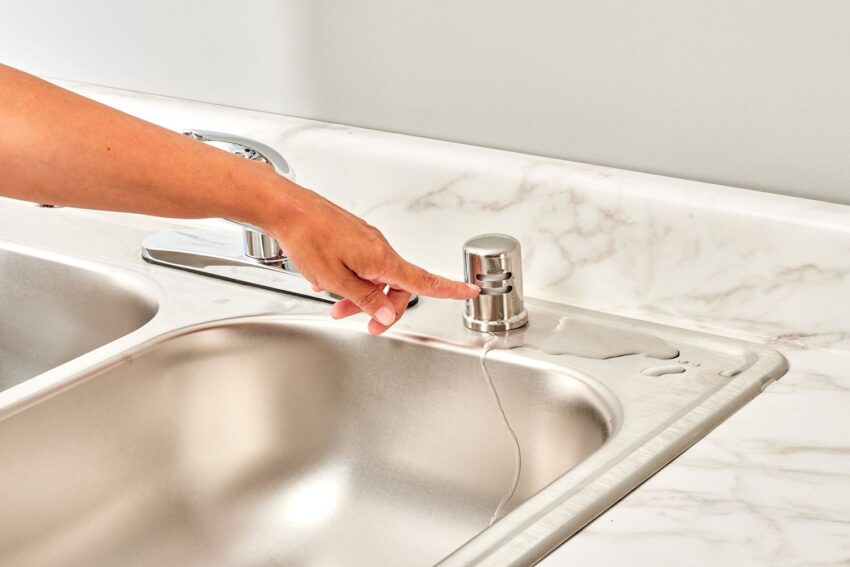
The dishwasher air gap, a small device typically installed on the countertop or sink, plays a crucial role in safeguarding against potential contamination. Acting as a barrier between the dishwasher and the sewer system, it adds an extra layer of protection. By creating a gap of air, the air gap effectively prevents any wastewater from flowing back into the dishwasher. This safety feature is essential in ensuring that dirty water doesn’t contaminate the clean dishes. Additionally, it helps prevent situations like dishwasher leaking into the basement, which can cause significant damage. As a result, many building codes require the installation of an air gap for dishwashers to maintain a high level of sanitation and safety.
Signs of a Leaking Dishwasher Air Gap
Identifying a leaking dishwasher air gap is relatively easy. Here are a few signs to look out for:
- Water leaks from the air gap itself or around its base.
- Pools of water form around the sink or countertop area when the dishwasher is running.
- Dampness or water damage on the cabinets beneath the sink.
If you notice any of these signs, it’s important not to ignore them, as they can indicate a faulty or clogged air gap that needs attention.
Causes of a Leaking Dishwasher Air Gap
Several factors can contribute to a leaking dishwasher air gap. Understanding these causes will help you determine the appropriate solution. Here are some common culprits:
- Clogged air gap: Debris and food particles can accumulate in the air gap over time, obstructing the flow of water and causing leaks.
- Improper installation: If the air gap is not installed correctly, it can lead to leaks. Poor connections or loose fittings may cause water to escape from the air gap.
- Damaged or worn-out components: Over time, the air gap’s components, such as the cap, vent, or seals, can deteriorate, leading to leaks.
Now that we have a better understanding of the dishwasher air gap and its potential causes of leakage, let’s move on to fixing the problem.
Steps to Fix a Leaking Dishwasher Air Gap
Before starting any repair work, make sure to turn off the dishwasher and disconnect the power to ensure safety. Now, let’s go through the step-by-step process of fixing a leaking dishwasher air gap:
Step 1: Turn off the dishwasher and disconnect the power
Safety should always be a priority when dealing with electrical appliances. Turn off the dishwasher and unplug it from the power source before proceeding with any repairs.
Step 2: Remove the air gap cover
The air gap cover is usually located on the countertop or sink. Gently twist or lift the cover to remove it and expose the air gap’s inner components.
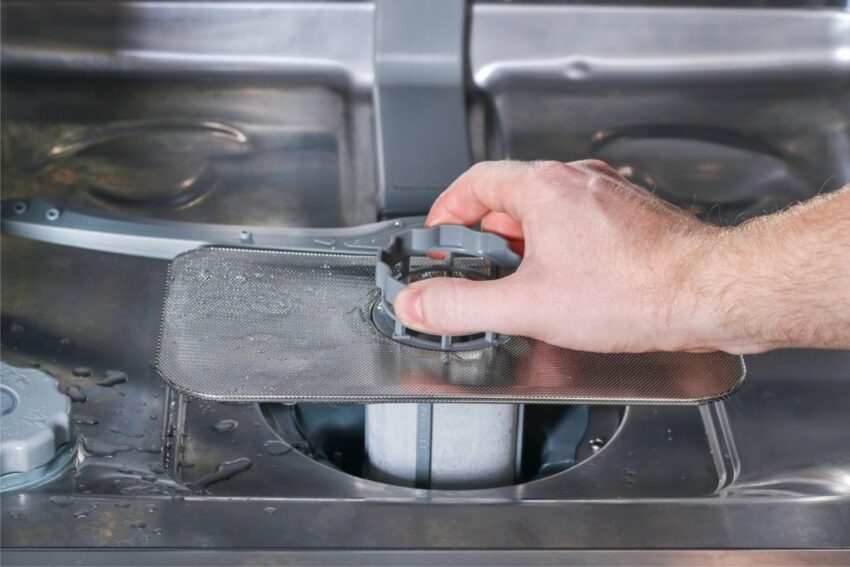
Step 3: Clean the air gap components
Inspect the air gap for any debris or food particles that might be causing the blockage. Use a small brush or toothpick to remove any obstructions carefully. Rinse the components with warm water to ensure they are clean.
Step 4: Check the drain hose and connections
Inspect the drain hose connected to the air gap and make sure it is not kinked or damaged. Ensure that all connections between the dishwasher, air gap, and drain line are secure and tight.
Step 5: Replace damaged or worn-out parts
If you notice any damaged or worn-out parts during the inspection, such as cracked seals or broken vents, it’s advisable to replace them. Consult the dishwasher’s user manual or contact the manufacturer for specific replacement parts.
Step 6: Reassemble the air gap
Once you have cleaned the components and replaced any necessary parts, carefully reassemble the air gap. Ensure that everything is properly aligned and tightened to avoid future leaks.
Step 7: Test for leaks
After reassembling the air gap, it’s time to test for leaks. Turn on the dishwasher and run it through a regular cycle. Keep a close eye on the air gap to see if any water leaks occur. If there are no signs of leakage, congratulations, you have successfully fixed your dishwasher air gap!
Preventing Future Leaks
Taking preventive measures can help you avoid future dishwasher air gap leaks. Here are some tips to keep in mind:
- Regularly clean the air gap and its components to prevent debris accumulation.
- Avoid placing large food particles or debris in the dishwasher, as they can cause clogs and put strain on the air gap.
- Schedule routine maintenance for your dishwasher to ensure all components are in good working condition.
Conclusion
Fixing a leaking dishwasher air gap doesn’t have to be a daunting task. By following the step-by-step guide outlined in this article, you can resolve the issue and prevent further damage to your dishwasher and kitchen. Remember to prioritize safety, and if you’re unsure about any steps, consult a professional or contact the dishwasher manufacturer for guidance.
You may like to read How to Clean a Drain with Baking Soda and Vinegar