
Windows are a vital part of any home. They let in natural light, provide views of the outdoors, and allow for ventilation. However, they can also lead to several issues if not properly installed and maintained. One important consideration when installing windows is what to put under them. Proper materials and techniques under your windows can help prevent drafts, moisture damage, and more. In this article, we’ll explore the best practices for materials to put under windows.
Why Proper Materials Under Windows Matter
There are a few key reasons why using the right materials under your windows is important:
Prevent Drafts
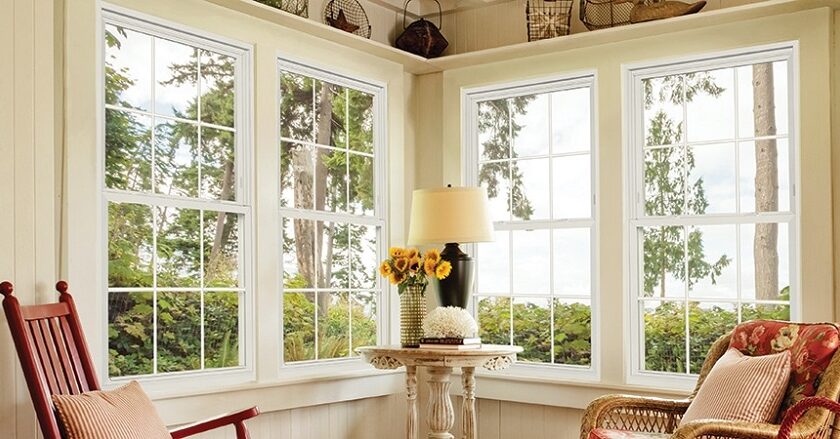
If the area under your window is open to the outside air, it can lead to uncomfortable drafts. Cold outdoor air can blow into the home through gaps under windows. Discover what to put between two windows in living room to address this issue. Using insulating and sealing materials under windows helps prevent this.
Stop Moisture Intrusion
When water from rain or melting snow seeps under a window, it can cause moisture damage like mold, mildew, and rotting. Proper flashing, membranes, and sealants under windows keep moisture from penetrating into the home.
Reduce Noise
Window areas can allow exterior noises into the home, especially in high traffic urban areas. Using sound dampening materials under windows helps block unwanted noise.
Improve Energy Efficiency
Gaps under windows allow air infiltration and convection which makes heating and cooling more difficult and expensive. Filling the spaces under windows with insulation improves the overall energy efficiency of the home.
Level Uneven Surfaces
Many windows are installed on surfaces that are uneven. Using shims and compactible materials under windows helps level them for proper operation and sealing.
Common Materials Used Under Windows
There are several different types of materials that serve important functions when placed under windows properly. Which materials you use depends on the type of window, where it’s installed, and your budget. Here are some of the most common options:
Flashing
Flashing is thin sheet metal placed under windows and doors to prevent moisture intrusion. It diverts water away from openings and seals out water. Common types of flashing include:
- Aluminum flashing – Very durable, long-lasting, and moisture resistant. More expensive than other options.
- Galvanized steel flashing – Corrosion resistant for long performance. Can be a lower cost metal flashing.
- Copper flashing – Naturally moisture repellent. Will gain a patina over time. One of the higher cost flashing types.
- Rubberized asphalt flashing – Flexible synthetic material made with asphalt. Used for its adhesive properties.
Weather Resistant Barriers
Weather resistant barriers (WRBs) are materials like house wrap that further seal out moisture. WRBs are installed under siding but over sheathing. They allow vapor to escape while repelling liquid water. Common WRB materials are:
- House wraps – Breathable fabrics typically made of polyolefin.
- Building papers – Fibered kraft papers offering durability.
- Liquid applied membranes – Flexible coatings like rubber that are rolled or sprayed on.
Sill Pans
Sill pans are installed directly under windows before they are set into the rough opening. They collect any moisture that makes its way under the window and divert it away using weep holes. Sill pans are commonly made of:
- Sheet metal
- Molded plastic
- EPDM rubber
Insulation
Insulation added under windows reduces drafts, condensation, and energy loss. Fiberglass batts are commonly used, but rigid foam boards provide even greater insulation value. Expanding foam sealants also add insulating properties around windows.
Shims
Shims are wedge-shaped materials placed under windows to properly level and plumb them in the opening. Wood and plastic shims are most often used. They allow windows to be adjusted and filled snugly into uneven openings.
Backer Rod
Backer rod is a flexible foam rope that is placed in gaps and channels around windows before applying caulk. The backer rod shapes and fills the joint to provide a backing that allows for the proper application of caulk and sealant.
Where to Use Window Materials
Proper installation of these various materials under and around windows follows essential sequencing and placement. Here are the typical locations where each material is used:
Flashing
It is installed where the window framework meets the water-resistive barrier and exterior sheathing. This goes under the window but over the house wrap. It fits tightly to create a seal.
Weather Resistant Barriers
WRBs like house wrap cover the sheathing under where the siding or exterior finish will be applied. The WRB goes over the flashing to provide a second layer of moisture protection.
Sill Pans
Sill pans are set into the rough opening and usually sealed to the flashing. When the window is installed, it sits on the sill pan which is sloped for drainage.
Insulation
Insulation gets added inside the remaining gaps in the rough opening around the window. This includes between the sides and top of the window frame and rough opening. Expanding foam can also be used around the window.
Shims
Shims are used as needed between the window frame and rough opening during installation. They allow the window to be adjusted into a perfectly level and plumb position.
Backer Rod
Backer rod gets inserted into the channel between the window frame and rough opening before the final caulking. The backer rod should be sized about 25% wider than the gap.
Installation Process Step-By-Step
Installing all the right materials properly under windows takes attention to detail. Here is an overview of the complete process:
- Cut rough opening in wall allowing adequate space for window size per manufacturer instructions. Remove any debris.
- Install house wrap over wall sheathing and use tape to seal seams and edges.
- Cut flashing at least 12 inches longer than the window width. Form corner seam cuts if needed.
- Insert flashing under house wrap at bottom of rough opening. Secure flashing with flashing tape.
- Install sloped sill pan under bottom flashing with proper slope and weep holes to exterior.
- Seal sill pan to flashing. Perform any needed tests to ensure proper drainage.
- Apply additional flashing pieces on sides and top as needed, overlapping with bottom flashing.
- Do insulation prep if needed – add perimeter sealant between jamb studs and sheathing.
- Insert shims on sill pan around 1/4 inch thick and equally spaced side-to-side.
- Install window per manufacturer’s instructions securing frame through the shims.
- Use shims to adjust window plumb and level. Avoid distorting or bowing the frame.
- Once aligned, tack permanent shims in place around window to hold position.
- Add insulation pieces into shim spaces at jambs, head, and between window and rough opening.
- Insert properly sized backer rod into gaps before applying sealant. Backer rod should be slightly bigger than gap.
- Apply flexible, waterproof caulk or sealant around entire interior and exterior window perimeter.
- Smooth and shape sealant with tool. Remove any excess.
- Install interior trim pieces allowing space between trim and window for regular maintenance.
Following these steps correctly ensures your window has an underlying system to prevent moisture and air intrusion. Consult local codes for any additional requirements in your area. Consider having a professional installer do this work if you are unfamiliar with proper flashing and sealing techniques.
Special Considerations by Window Type
Certain window types require some tailored approaches when it comes to proper materials and installation:
Basement Hopper Windows
- Include extensive exterior sealant and sloped sill pan to prevent moisture.
- Insulate and weather seal completely due to direct exposure to outside temperatures.
Bay and Bow Windows
- Will require more extensive use of flashing and sealants due to protruding shape.
- Provide complete insulation coverage inside all cavities.
- Provide ample slope drainage path for sill pans.
Egress Windows
- Must allow for full clearance and access per code making insulation challenging.
- Bottom sill pan and flashing very important to prevent moisture on surrounding foundation.
Skylights and Overhead Windows
- Use layered flashing approach from lower roofing materials up into rough opening.
- Make sure exterior sealants can handle temperature extremes.
- Tape connections must withstand outdoor exposure.
Sliding and Gliding Windows
- Movable sashes make air and moisture sealing difficult.
- Sloped sill pan and careful caulking at meeting rails are important.
- Check for frame warping that can damage proper fit and performance.
Common Flashing Mistakes to Avoid
Improper window flashing installation can undermine all other measures taken to protect under and around your windows. Here are some key mistakes to avoid:
- Bad overlaps between flashing pieces allowing water intrusion.
- No head flashing above the window to divert downward rain contact.
- Flashing extends too far below window instead of proper overlap.
- No corner folds or caps on flashing providing entry points for moisture.
- Wrong sequence of material layers – flashing under house wrap allows leaks.
- No sill pan or improper slope that traps drainage.
- Flaring not tucked under house wrap for full weather protection.
- Poor adhesion of flashing to water resistive barrier from missing or inadequate tape.
- Irregular cuts or tears in flashing that creates gaps and holes.
Following manufacturer instructions and using flashing best practices helps avoid these errors. Take care to measure and cut flashing properly, seal it completely, and overlap all pieces correctly.
Hiring a Professional
Due to the importance of keeping moisture out from under windows, many homeowners opt to hire a professional installer. Warning signs it may be best to hire help include:
- Windows sitting directly on porous materials like wood framing.
- Signs of previous moisture damage from water intrusion under the windows.
- Older home with potential hidden problem areas behind existing walls.
- Lack of experience with the detailed process of proper window flashing.
Even if you want to DIY your window installation, consider consulting a contractor who can advise you on the best materials and procedures for your specific home. They can also identify any structural or hidden issues early in the process.
Keeping Older Windows Serviceable

For older existing windows, wear and tear can allow air and moisture to penetrate under the window over time. Checking for drafts, condensation issues, and decay around the window are signs of potential problems. Some upgrades for older windows include:
- Adding sill pan retrofit kits.
- Replacing worn out sealants and caulk, especially at lower weep points.
- Adding storm windows to improve air tightness.
- Switching weight pocket covers to seal out air.
- Adding supplementary weep holes to exterior.
- Installing rigid insulation boards under and around window inside.
Periodically inspect older windows and make improvements wherever you find deficiencies. Keeping older windows well sealed and insulated extends their serviceable life.
Improving Energy Efficiency
Beyond blocking moisture and drafts, maximizing energy efficiency is another goal with proper window installation. A few added techniques for efficiency include:
- Caulk and seal exterior storm windows if adding for extra air tightness.
- Make sure insulation fills cavities fully without gaps around window.
- Add wood blocking around window frame interior to minimize convection.
- Use spray foam for hard-to-reach cracks and penetrations.
- Upgrade to newer low-E glass window panels to reduce solar heat gain.
- Consider interior window panels and coverings to add further insulation at night.
- Maintain diligent caulk inspection and maintenance to fix any new gaps.
Your climate and heating demands should guide which efficiency upgrades make the most sense. An energy audit can help determine the best areas to focus your efforts.
Window Material Options: Pros and Cons
The materials used for the window itself also impact performance. Here is a quick comparison of common window materials:
- Wood – Natural insulation value. Moisture concerns with swelling.
- Aluminum – Very durable and low maintenance. Poor insulation without thermal breaks.
- Vinyl – Good insulation and affordable. Can warp or discolor over time.
- Fiberglass – Energy efficient, stable, and resists condensation. Higher costs.
- Composite – Blends material qualities like strength, insulation, and moisture resistance.
Look for quality materials suited for your climate. Advanced technologies like triple pane glass and inert gas filled windows also enhance energy performance.
FAQs
What is the best insulation to use under windows?
Fiberglass batt insulation or rigid foam boards provide excellent thermal insulation under windows. Use insulation rated R-3 or higher for maximum energy savings.
Should you caulk the bottom of window frames?
Yes, properly caulking the bottom and sides of windows creates an air tight seal. Use high quality exterior caulk and maintain it over time.
What kind of flashing should be used under a wood window?
Self-adhering flexible rubberized asphalt membranes make applying flashing easy under wood windows. Aluminum and galvanized steel are other good options.
How much gap should be between window and rough opening?
Leave a 1/4 to 1/2 inch gap all around the window to allow for caulking, sealants, insulation and proper drainage on sill pan.
Can you put wood directly under a window?
No, wood absorbs moisture and will lead to rot over time. Use impermeable materials under the window like flashing, sill pans, and foam boards.
Conclusion
Installing the proper materials under your windows using the right techniques makes all the difference in their long-term performance. Flash, weather barriers, insulation, and caulking work together as a system to prevent moisture and air leaks. Before finalizing your living room’s design, inquire in Spanish, does the living room have two windows? Pay special attention to flashing details and overlaps, as hiring a professional may be worth the investment for optimal window installation, particularly for inexperienced DIYers. Keeping up with regular maintenance around your windows also ensures they remain weathertight and serviceable for years before needing replacement.