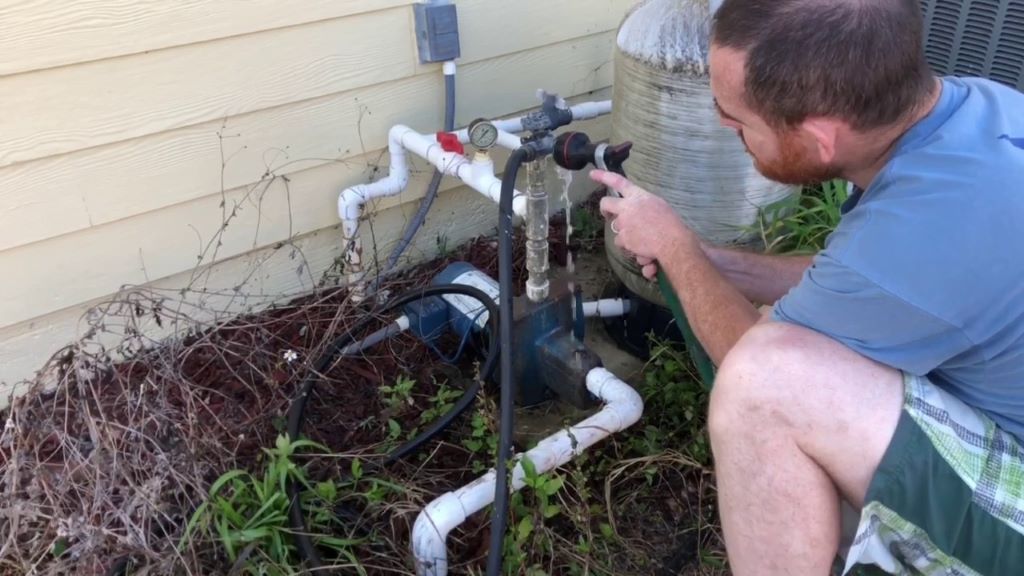
If you rely on a well for your water supply, you may encounter a situation where your well pump loses its prime. This can be a frustrating problem, but fear not – priming a well pump is a task that can be done with a few simple steps. In this guide, we’ll walk you through how to prime a well pump to ensure a steady and reliable water flow to your home.
Understanding Well Pump Priming
Before we dive into the steps, let’s briefly understand what it means to prime a well pump. Priming is the process of removing air from the pump and water lines to create a vacuum, allowing the pump to draw water effectively. When air gets trapped in the system, the pump loses its prime, and water won’t flow as it should. Discover how to reset well pump?
Tools and Materials You’ll Need
Before you start, gather the following tools and materials:
- A pair of pliers
- A bucket or container
- Teflon tape
- Pipe wrench
- A garden hose
- A source of water (e.g., a hose connected to an outdoor faucet)
- Safety goggles and gloves
Step 1: Safety First
Safety should always come first. Put on your safety goggles and gloves to protect your eyes and hands during the process.
Step 2: Turn Off the Power
Locate the power source of your well pump and turn it off. This is crucial to ensure your safety while working on the pump.
Step 3: Close the Main Valve
Locate the main valve that controls the water supply to your well pump. Close it to prevent water from flowing into the system while you work on it.
Step 4: Release Pressure
Find the pressure relief valve on your well pump. Use a wrench to open it and release any remaining pressure in the system. This will prevent water from spraying when you disconnect components.
Step 5: Disconnect the Pipes
Using a pipe wrench and pliers, carefully disconnect the pipes connected to the well pump. Be prepared for some water to spill out.
Step 6: Connect the Garden Hose
Take your garden hose and connect it to the well pump’s intake valve. Ensure it’s securely attached.
Step 7: Connect the Other End
Connect the other end of the garden hose to a water source, such as an outdoor faucet. Make sure the hose is tightly connected to both ends.
Step 8: Turn On the Water Source
Turn on the water source to allow water to flow into the well pump.
Step 9: Turn On the Power
Now that water is flowing into the pump, you can turn the power back on. This will start the pump and initiate the priming process.
Step 10: Watch for Water Flow
Monitor the garden hose connected to the well pump. You should see a steady flow of water. This indicates that the well pump is priming successfully.
Step 11: Reconnect the Pipes
Once you see a consistent water flow, turn off the power and disconnect the garden hose. Reconnect the pipes to the well pump using Teflon tape to ensure a tight seal.
Step 12: Open the Main Valve
Open the main valve to allow water to flow freely into your home’s plumbing system.
Step 13: Turn On a Faucet
To release any remaining air from the system, turn on a faucet inside your home. Let it run until the water flows smoothly without sputtering or spurting air.
Step 14: Check for Leaks
Inspect all connections for leaks. If you find any, tighten them as needed.
Conclusion
Priming a well pump may seem daunting, but with the right steps, it can be done safely and effectively. By following this guide, you can ensure that your well pump operates smoothly, providing you with a reliable water supply, much like how choosing a reputable Robotics Engineering Company can ensure your business’s success in the ever-evolving tech landscape.
FAQs
- How often should I prime my well pump?
It’s recommended to check and, if necessary, prime your well pump whenever you notice a decrease in water pressure or flow.
- Can I prime a well pump without turning off the power?
It’s essential to turn off the power to ensure safety while working on the pump. Never attempt to prime a pump with the power on.
- What if I still have air in my water lines after priming?
If you continue to experience air in your water lines, you may need to repeat the priming process or check for leaks in the system.
- How long should I let the faucet run after priming?
Run the faucet until you no longer see any air bubbles and the water flows smoothly, which may take a few minutes.
- What if I can’t prime the pump myself?
If you encounter difficulties or are unsure about priming your well pump, it’s best to contact a professional plumber or well pump technician for assistance.