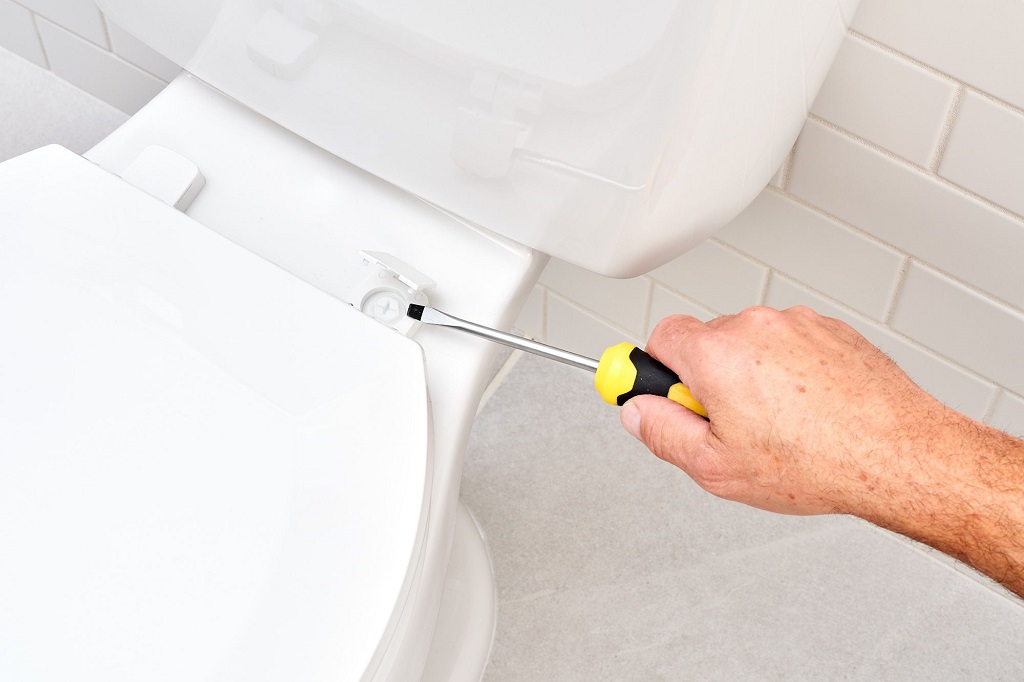
To tighten a toilet seat, locate the bolts under the seat and use a screwdriver to tighten them. Do not overtighten to avoid damaging the toilet or seat.
Properly securing the toilet seat is crucial for a stable and safe bathroom experience. Loose toilet seats can be annoying and potentially hazardous, but fortunately, tightening them is a simple task that anyone can do. Whether you’re a DIY enthusiast or want to save money on a handyperson, learning how to draw a toilet seat is valuable.
In this guide, we’ll walk you through the steps to effectively secure your toilet seat, ensuring a comfortable and safe bathroom environment for you and your family. A securely fastened toilet seat is essential for preventing wobbling and potential accidents, contributing to a more pleasant and secure bathroom experience. Whether you’re installing a new seat or tightening an existing one, following the right procedures can make a significant difference in the stability and longevity of your toilet seat. With clear instructions and the appropriate tools, you’ll find that securing your toilet seat is a straightforward and manageable task. For more helpful tips and comprehensive guides on maintaining and improving your home, Beebuze offers a wealth of resources designed to assist homeowners in achieving a safer, more comfortable living space.
Why A Loose Toilet Seat Is A Problem
Discover why a loose toilet seat can be inconvenient and learn how to tighten your toilet seat quickly without any hassle. A wobbly toilet seat is not only annoying but can also lead to potential damage or injury if not addressed. Moreover, issues such as toilet seat peeling can exacerbate the problem, making it even more urgent to secure the seat properly. Say goodbye to unnerving wobbles with our simple step-by-step guide. This guide will provide you with the knowledge and tools you need to ensure your toilet seat is firmly attached, enhancing the safety and comfort of your bathroom. Follow our instructions to maintain a stable and secure toilet seat, avoiding the discomfort and inconvenience of a loose or damaged seat.
Uncomfortable Seating Experience
A loose toilet seat can make an uncomfortable seating experience frustrating and impractical.
Potential Hygiene Issues
When a toilet seat is loose, it can create potential hygiene issues as it may shift and expose hidden areas where bacteria can thrive.
Determining The Cause Of The Loose Toilet Seat
When dealing with a loose toilet seat, it’s essential to accurately determine the cause before attempting any repairs. Understanding the root issue will enable you to tighten the seat effectively and prevent future loosening. Two common causes of a loose toilet seat are – open seat attachments and loose hinges or bolts.
Checking The Seat Attachments
One of the initial steps in addressing a loose toilet seat is to inspect the seat attachments. These typically comprise nuts and bolts securing the seat to the toilet bowl. Use a wrench to check if the nuts are securely fastened. If they are loose, use the wrench to tighten them. Ensure the nuts are snug, but do not overtighten, as it may damage the toilet seat or bowl.
Identifying Loose Hinges Or Bolts
Loose hinges or bolts can also contribute to a wobbly toilet seat. Inspect the hinges to see if they are firmly attached to the toilet bowl. If any bolts or screws are loose, use a screwdriver to tighten them. Be cautious not to over-tighten plastic hinges to avoid cracking the plastic. If pulling the existing hardware does not resolve the issue, consider replacing them with new ones.
Tools Needed For Tightening A Toilet Seat
When tightening a toilet seat, having the right tools is essential. The proper tools will make the job easier and ensure the seat is securely fastened, providing stability and preventing unwanted shifting or movement. This blog post will discuss the essential tools you’ll need to tighten a toilet seat: a screwdriver and a wrench.
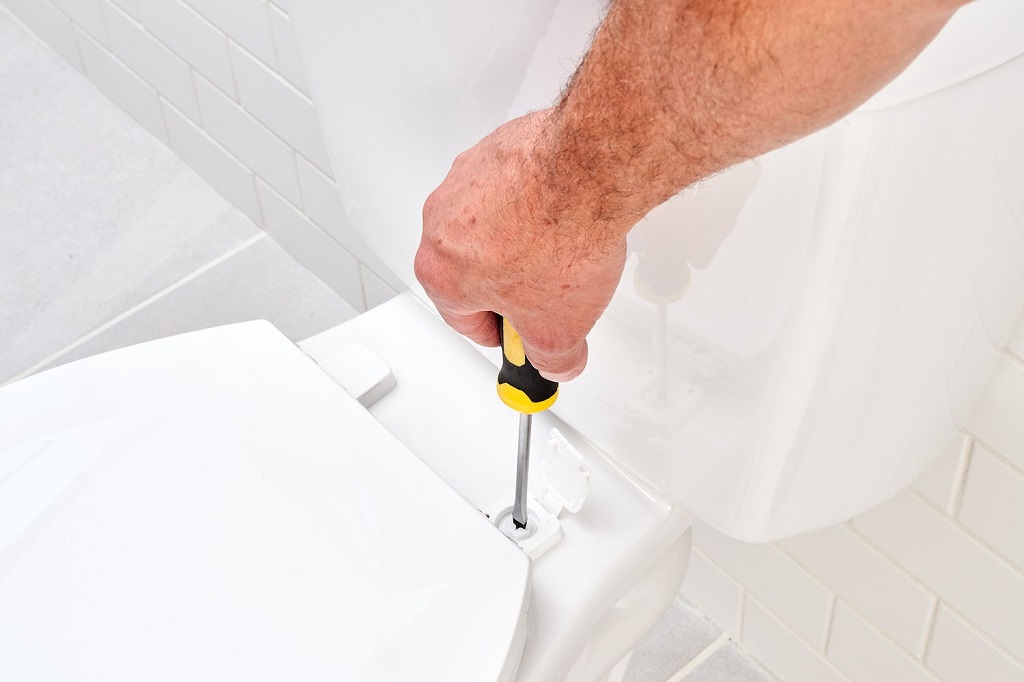
Screwdriver
A screwdriver is a versatile tool that can be used for various household repairs and projects. When tightening a toilet seat, a screwdriver is an invaluable tool. It can be used to unscrew the bolts that hold the seat in place and tighten them securely. Here’s how you can use a screwdriver to pull a toilet seat:
- Locate the screw or bolt holding the toilet seat in place.
- Using the appropriate type of screwdriver (typically flathead or Phillips), turn the screw clockwise to tighten it.
- Make sure not to overtighten the screw, as this can damage the seat or the toilet itself.
- Repeat the same process for all the screws or bolts holding the seat, ensuring each one is tightened securely.
Wrench
A wrench, also known as a spanner, is designed to provide a firm grip and leverage for turning objects like nuts and bolts. When tightening a toilet seat, a wrench can secure the nuts holding the seat in place. Follow these steps to use a wrench to pull a toilet seat:
- Identify the nuts that need to be tightened on the underside of the toilet bowl.
- Place the wrench around the nut and hold it firmly.
- Rotate the wrench clockwise to tighten the nut.
- Ensure the nut is tightened enough to prevent any seat movement, but be careful not to overtighten it.
- Repeat the same process for all the nuts holding the seat, ensuring they are all securely tightened.
With a screwdriver and wrench, you’ll have everything you need to ensure a snug and secure toilet seat. Remember to use these tools carefully, avoiding excessive force that could cause damage. Tightening your toilet seat properly will provide peace of mind and a stable seat for years to come.
Step-by-step Guide To Tightening A Toilet Seat
Are you tired of constantly readjusting a loose toilet seat? It’s not only annoying but can also be unhygienic. In this step-by-step guide, we’ll show you how to tighten your toilet seat correctly and securely, ensuring a stable and comfortable experience every time you use the bathroom.
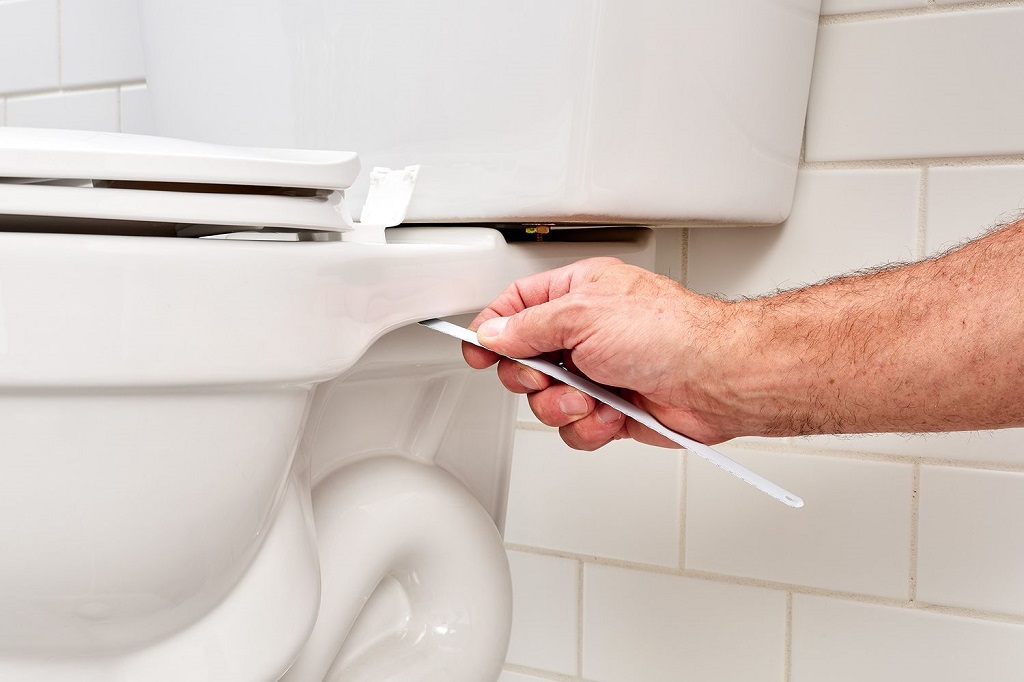
Remove The Seat Cover
The first step is to remove the seat cover to access the attachments and bolts beneath. Follow these simple steps:
- Lift the seat cover.
- Locate the seat attachment or hinge covers on the toilet bowl.
- Using your fingers or a flathead screwdriver, gently open the covers to expose the attachments or hinges. Be careful not to apply excessive force to avoid damaging them.
Tighten The Seat Attachments Or Hinges
Once the attachments or hinges are exposed, follow these steps to tighten them:
- Inspect the attachment or hinge screws to identify if they are loose.
- Using a suitable screwdriver, rotate the screws in a clockwise direction to tighten them. This should eliminate any wobbling or movement in the toilet seat.
- Be cautious not to overtighten the screws, as this could strip the threads or crack the toilet bowl.
Secure The Bolts
Now that the attachments or hinges are tightened, it’s time to secure the bolts that hold the toilet seat in place. Follow these straightforward instructions:
- Locate the bolts at the back of the toilet bowl.
- Grab the nuts on both ends of the bolts located under the toilet bowl using a wrench or pliers.
- Rotate the nuts in a clockwise direction to tighten them. Ensure they are secure, but avoid overtightening to prevent damage.
- Test the toilet seat by sitting on it and check for any movement. If necessary, give the nuts an additional quarter turn for optimal stability.
Reinstall The Seat Cover
Lastly, it’s time to put the seat cover back in place while adhering to HTML syntax for the H3 headings. Follow these final steps to finish the process:
- Align the seat cover with the attachments or hinges.
- Lower the seat cover onto the attachments or hinges, ensuring they fit snugly.
- Press down on the seat cover to ensure it is securely attached.
- If applicable, close the attachment or hinge covers to hide the screws and give the toilet a clean, finished look.
Following this step-by-step guide, you can quickly tighten your toilet seat and enjoy a stable and secure bathroom experience. Remember to periodically check and pull the seat to prevent discomfort or potential accidents.
Preventing Future Toilet Seat Looseness
To tighten a loose toilet seat, check if the bolts are secure. If they’re open, use a screwdriver to draw them. If the seat continues to loosen, consider using a Loctite Threadlocker to secure the bolts. Additionally, be sure to check the hinges and tighten them if necessary to prevent future loosening.
Regularly Check And Tighten The Seat
Regularly checking and tightening your toilet seat is critical to preventing future looseness. Over time, the constant use of the toilet can cause the seat to become loose, leading to wobbling and discomfort. Following these simple steps, keep your toilet seat securely in place:
- First, inspect the hinges and bolts that attach the seat to the bowl. Look for any signs of wear or damage.
- Care tighten the bolts and hinges using a wrench or screwdriver. Make sure not to overtighten, as this may cause them to break or strip.
- Give the seat a gentle shake to check for any remaining looseness. If it still wobbles, adjust the bolts until it feels secure.
Regularly checking and tightening your toilet seat ensures your comfort and helps prevent any accidents or injuries due to a loose seat.
Consider Replacing Worn-out Seat Components
If your toilet seat continues to loosen even after tightening, it may be time to consider replacing worn-out components. Over time, the hinges, bolts, and other seat parts can wear down, making it challenging to keep it securely in place. Follow these steps to replace the worn-out components:
- Start by unscrewing the seat’s bolts. Depending on the type of bolts used, use a screwdriver or wrench.
- After removing the bolts, carefully lift the seat and hinges from the bowl.
- Inspect the components for any signs of damage or wear. Replacing any part with new ones is best if it looks worn or broken.
- Purchase a replacement seat or individual components from your local hardware store or online retailer if needed.
- Align the new components with the holes in the toilet bowl and secure them in place using the provided hardware.
- Tighten the bolts evenly, alternating between the two sides. Again, make sure not to overtighten.
By replacing worn-out seat components, you can ensure a secure and stable toilet seat that doesn’t loosen over time.
Frequently Asked Questions For How To Tighten Toilet Seat
How Do I Tighten A Loose Toilet Seat?
To tighten a loose toilet seat, locate the bolts underneath the seat. Use a screwdriver or wrench to tighten the nuts on the bolts. Do not overtighten to avoid damaging the seat or toilet.
Why Is My Toilet Seat Moving?
A toilet seat may become loose due to regular use or improper installation. Loose bolts could also be the issue. Tightening or replacing the bolts is essential to prevent further movement and potential damage to the toilet.
What Tools Do I Need To Tighten A Toilet Seat?
To tighten a toilet seat, depending on the type of bolts holding it in place, you will need a screwdriver or wrench. Check the size and type of the bolts before selecting the appropriate tool for the job.
How Often Should I Check For A Loose Toilet Seat?
It is recommended that you inspect your toilet seat regularly. Check for any movement or signs of loosening at least once every few months. This will ensure issues are addressed promptly and prevent accidents or further damage.
Conclusion
To conclude, tightening a toilet seat is a simple task that can be quickly done with a few essential tools and steps. Following the steps outlined in this blog post, Learn How Do You Unblock a Toilet Full of Tissue Remember to regularly check and tighten the bolts to maintain the integrity of your toilet seat. With these easy-to-follow instructions, you can confidently tackle this DIY project and enjoy a sturdy and stable seat for years.