Dealing with a severely clogged sink or replacing an old drain can be a daunting task, especially when it comes to removing the drain. But don’t worry, with the right tools and techniques, this process can be accomplished with ease. In this comprehensive guide, I will provide you with detailed step-by-step instructions on how to remove a sink drain. From identifying the type of drain you have to select the right tools and disassembling the drain, I’ll cover everything you need to know how to remove sink drain. So, whether you’re a DIY enthusiast or a beginner, you can confidently tackle this task and have your sink draining smoothly in no time.
Gather Your Materials Gather Your Courage!
First things first – take a deep breath and gather both your materials and your courage for the task ahead. Having the right gear on hand will give you the confidence boost needed to rip that sucker out!
Here’s what you’ll need:
- Adjustable wrench – for loosening nuts and connections
- Bucket – to catch any water still in the pipe
- Rags – to wipe up spills (things could get messy!)
- Replacement drain parts – don’t wait until the end to realize it won’t fit!
- Safety glasses – protecting your peepers is key during the demo
Alright, suit up with your safety glasses, and let’s start dismantling this beast!
Shut Off Water Supply Lines Avoid Unwanted “Bathing” Experience
I’m sure an impromptu sink spray bath sounds fun, but not today. Before going any further, locate the shut-off valves underneath the sink and turn them clockwise to shut off both hot and cold water lines. Testing the faucet after doing so will prevent getting unexpectedly soaked!
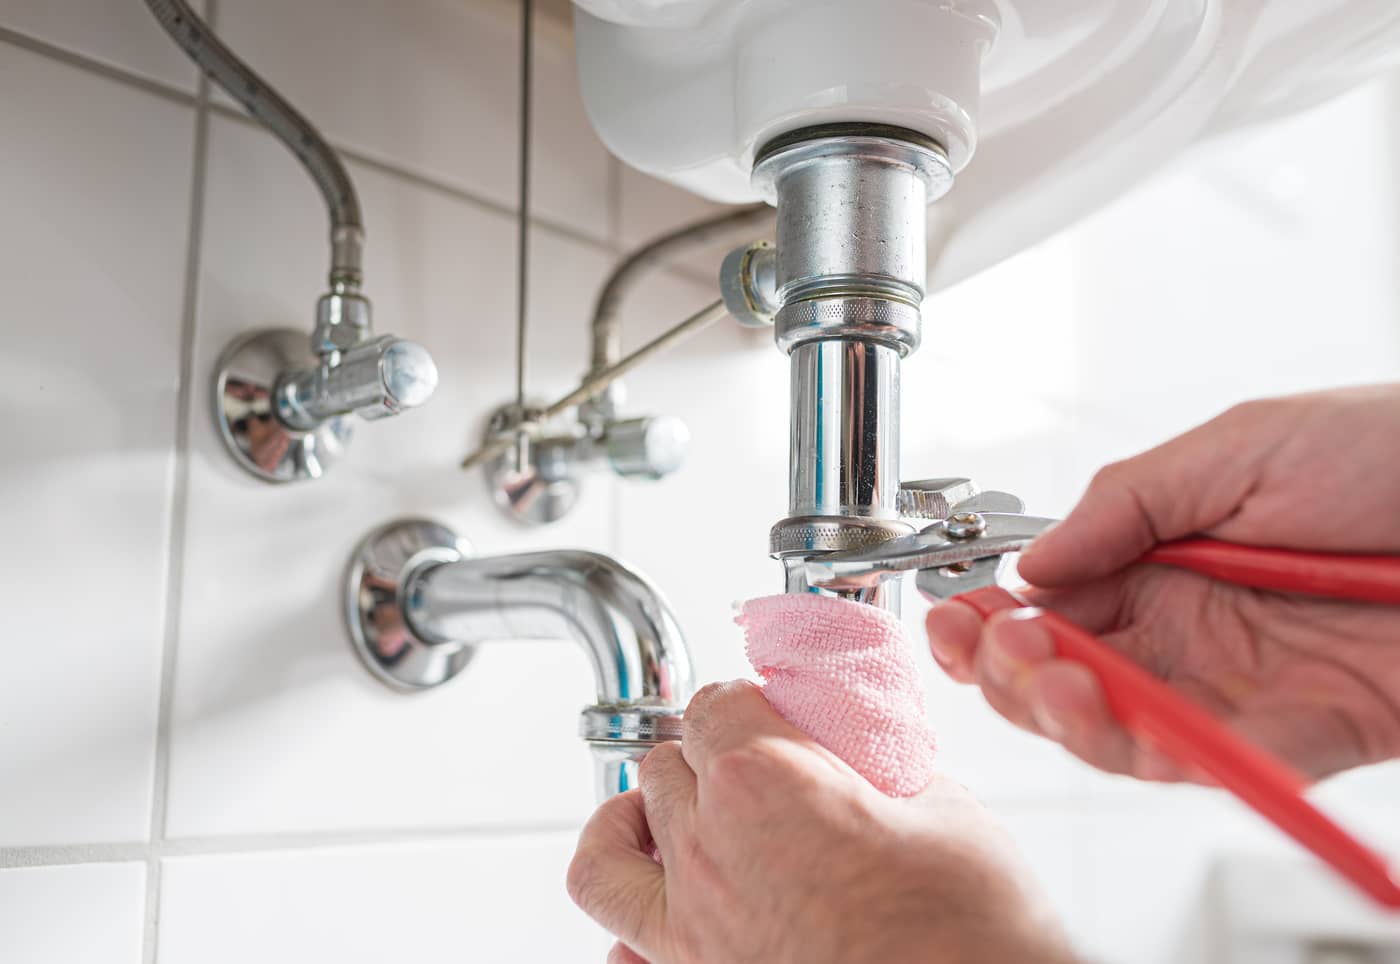
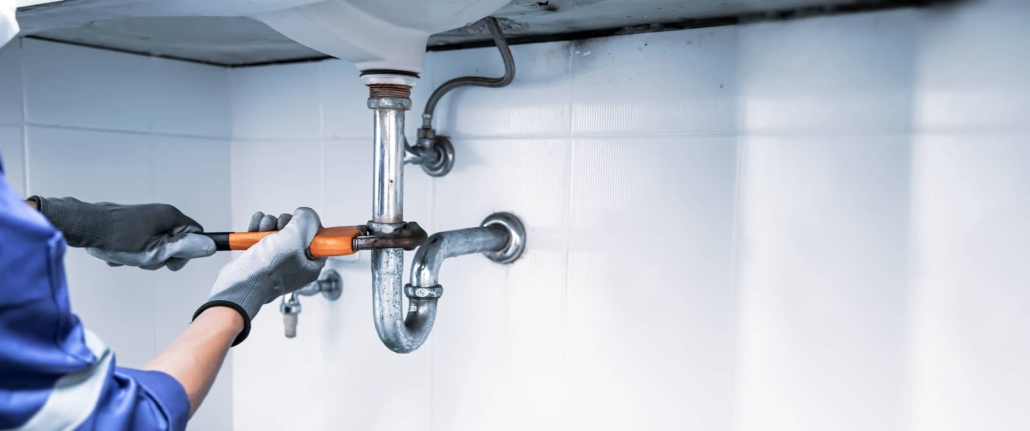
Disconnect the Drain Pipe From the Garbage Disposal/Drain Line
If your drain pipe connects to the sink on one end and a garbage disposal or main drain line on the other, freeing it from slavery is the next step. This will allow the entire drain assembly to be removed. Just loosen the connecting nut that joins the two with your trusty wrench.
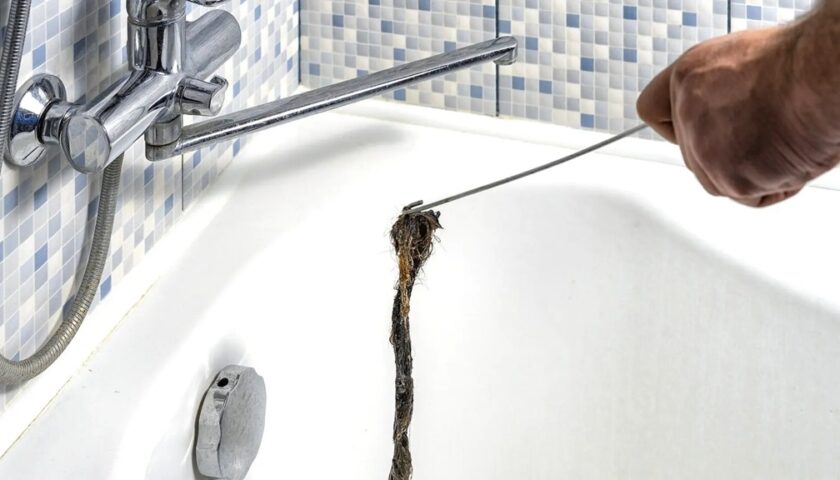
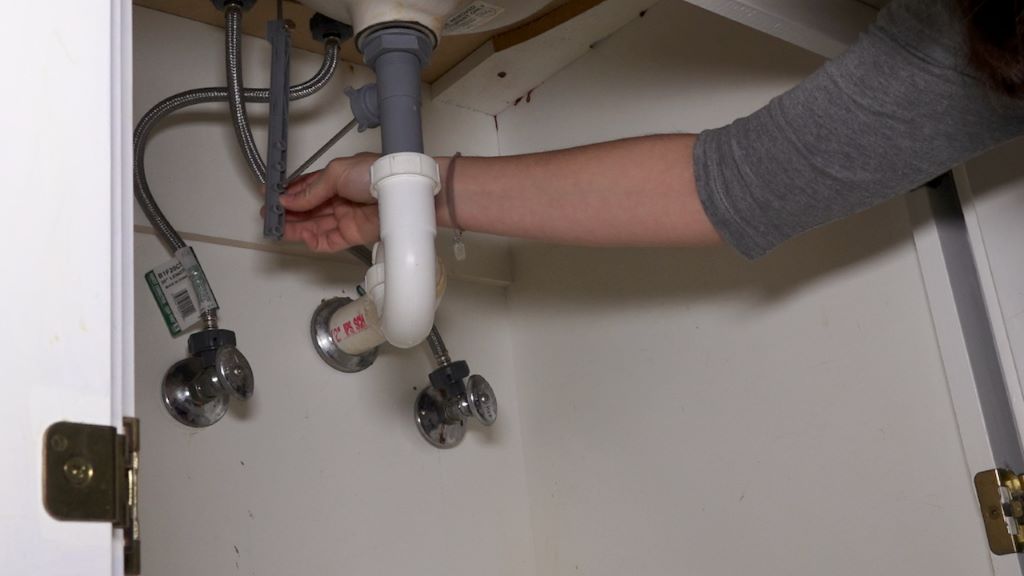
Remove P-Trap Releasing The Beast From Its Cage
The U-shaped pipe underneath the main sink drain is known as the P-trap. This humble curve is responsible for catching debris, allowing water to fill the sink basin, and also preventing sewer gases from entering your home. Talk about a multitasker!
Free the P-trap from its bolted connections to the drain and drain line using your wrench once more. Be ready to catch any water still sitting in the U when detached. I’ve learned from experience it’s better to use a bucket than your pants to collect unexpected liquid spillage.
With the P-trap removed, you’ve essentially released the drain beast from its cage. Well done!
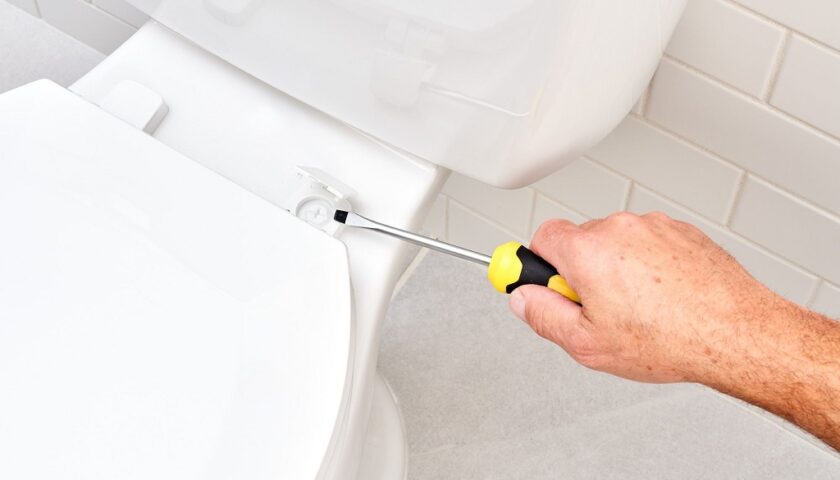
Unfasten Drain From Sink Freedom Is On The Horizon!
Next, it’s time to break the sink’s grip on the drain once and for all! To unfasten the drain body from the sink basin:
- Remove any decorative caps or covers concealing the drain mount. Plastic nuts mounting the drain often hide just beneath the shiny exterior.
- Use pliers or your trusty wrench to loosen and unscrew the mounting nuts holding the drain in place. Be persistent and patient here – they can put up quite the fight!
- Pull up firmly to dislodge the drain from its sink prison. Revel in sweet victory as it finally breaks free!
With the drain assembly now fully removed, the finish line is within sight. We’re so close to total liberation I can taste it!
Inspect Sink & Remove Drain Components Analyze The Damage
With the drain freed from the sink basin and pipe connections, now is an excellent time to inspect everything for damage or cracks. Check the sink itself around the drain hole for excessive rust, chips in porcelain, sealant failing, etc. This will determine if only the drain needs replacing vs. calling in a sink replacement as well.
Additionally, separating all washers, nuts, tubes, and other doodads from the main drain body is key. Firstly, inspect each part for wear or damage. Secondly, remove any hair, gunk, or grime so your new drain parts slide into a sparkling clean homeland when re-installed.
If the existing pieces pass inspection, a simple re-assembly with fresh sealant may suffice. But having new replacement parts on hand is wise, just in case. Forethought for the win!
Install New Drain
Ushering in the noble new drain should be done with care. After thoroughly cleaning the sink basin hole and P-trap connections, follow drain installation instructions to re-attach the fresh apparatus. Be sure to apply the plumber’s putty or caulk around the upper mount to prevent leaks from ruining this joyous occasion.
Once snugly secured, re-connect the darling P-trap and disposal/drain line to welcome your drainage newcomer to the family. Bask in this milestone moment!
Restore Water & Test Drain Celebrate Success!
The time has come to return water service to the faucet and celebrate your plumbing victory! After turning the shut-off valves counterclockwise to restore flow, remove the sink stopper and let that baby drain like never before. Turn on the faucet to full blast and allow gallons of life-giving liquid to swirl down the pipes while carefully inspecting connections for leaks.
If all goes smoothly without drips or back-ups, get those hands wet and enjoy washing away all your hard work. You’ve earned this moment, mighty drain remover – congratulations!
FAQs
- How can I tell if my drain is completely clogged?
If water starts accumulating in the sink basin rather than draining as usual, your sink is likely fully clogged. Slow drainage paired with gurgling sounds also indicates a blockage.
- Do I need putty or caulk when re-installing the drain?
Yes! A small bead of plumber’s putty or waterproof caulk around the upper drain mount helps create a tight seal and prevent leakage down the road.
- What do I do if the P-trap nuts won’t budge?
Penetrating oil can help loosen stubborn P-trap connections. Allow it to soak 5-10 minutes before attempting to unscrew the nuts with your wrench. Applying heat directly to the area with a hairdryer can also help break up grime.
- How do I clean gross gunk out of the drain pieces?
Used toothbrushes are perfect for scrubbing sludge out of the nooks and crannies of washers, tubes, etc. For more heavy-duty gunk, cover components with degreaser, let soak briefly, and rinse.
- When should I call a plumber instead?
If attempts to remove drain components result in cracked porcelain or pipes, seek professional help right away. Pro plumbers have specialized tools to remedy issues while preventing further damages down the line.
Ready To Tackle That Drain!
From the step-by-step guidance 6n how to remove sink drain that I provided, you can see that removing a stubborn sink drain is not as difficult as it may seem. With the right gear, patience, and a little bit of effort, you can take back control from that clogged monstrosity once and for all.
I have full confidence in you, mighty home plumbing crusader!
After successfully learning how to remove a tub drain, you should feel fully equipped to tackle any clogged sink drain with ease. If you have any other questions or concerns about plumbing or home improvement projects, don’t hesitate to reach out to me. I’m always here to offer advice and encouragement before you get your hands dirty with DIY endeavors.
So go ahead and take on that drain with confidence and determination! You’ve got this, and I’m here to support you every step of the way. Good luck, and Godspeed!