Tired of looking at those dated, scratched, or just plain boring countertops? You’re not alone. The kitchen is often the heart of the home, and worn-out work surfaces can drag down the entire feel of the space. Replacing countertops entirely with granite, quartz, or marble can be a major expense, often running into thousands of dollars. But what if there was a way to achieve a high-end, durable, and completely custom look for a fraction of the cost? Enter epoxy countertops.
This innovative solution has exploded in popularity, particularly in the DIY community, offering a path to stunning countertop makeovers. The “before and after” transformations achievable with epoxy are often dramatic, turning tired old surfaces into glossy, modern showpieces. Whether you’re tackling it yourself or hiring a pro, understanding the process, potential, and pitfalls of epoxy is key. Let’s dive into the world of epoxy countertops and see how they can revolutionize your kitchen or bathroom.
What Exactly Are Epoxy Countertops?
At its core, an epoxy countertop isn’t usually a solid slab of epoxy. Instead, it’s a coating – a resilient, glossy finish created by mixing a two-part system: epoxy resin and a hardener. When these two components are combined in precise ratios, a chemical reaction begins, causing the mixture to gradually harden (or cure) into an extremely durable, plastic-like solid.
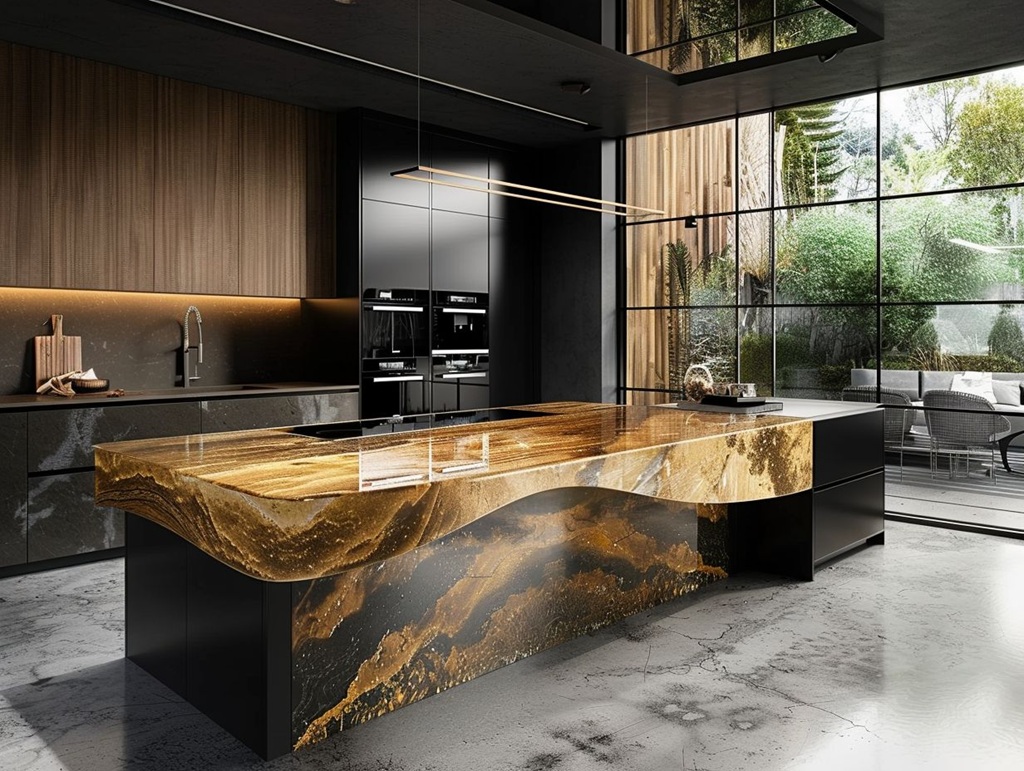
This liquid mixture is typically poured over an existing countertop surface – think laminate, tile, wood, MDF, or even concrete. As it levels and cures, it creates a seamless, non-porous surface. The real magic lies in the customization. Pigments, metallic powders, glitter, and various colorants can be added to the epoxy mixture before pouring. Skilled application techniques allow for the creation of stunning designs that mimic natural stone like marble or granite, or achieve unique artistic effects like flowing rivers, galaxies, or geodes. The result is a high-gloss (though matte finishes are possible with topcoats), continuous surface free from grout lines or seams.
The “Before”: Surfaces Begging for a Makeover
Why are homeowners turning to epoxy? Often, it starts with a countertop that’s seen better days. Let’s look at common “before” scenarios where epoxy shines:
- Dated Laminate: Perhaps the most common candidate. Old laminate countertops often feature faded patterns, peeling edges, burn marks, or scratches that betray their age. They might function okay, but aesthetically, they scream “past decade.” Epoxy offers a way to completely obliterate the old look without the mess of ripping out the existing base.
- Tired Tile: Tile countertops, while durable, come with the perennial problem of grout lines. These lines are magnets for dirt, grime, and stains, making them difficult to keep truly clean and hygienic. Over time, tiles can also crack or chip. Epoxy flows over the entire surface, eliminating grout lines and creating a smooth, easy-to-clean top.
- Worn Wood/Butcher Block: While beautiful initially, wood countertops require significant maintenance (oiling, sealing) and are susceptible to water damage, stains, deep scratches, and burn marks. Epoxy can seal and protect the wood underneath (after proper preparation) or provide a completely new, more resilient surface appearance.
- Basic Builder-Grade Surfaces: Many homes come with basic, uninspired solid surface or cultured marble countertops that lack personality. Epoxy provides an opportunity to inject custom style and colour without replacing a structurally sound countertop.
- DIY Concrete Projects: While concrete countertops can look industrial-chic, they are porous and prone to staining if not meticulously sealed and maintained. An epoxy topcoat can provide that necessary seal with added flair.
In all these cases, the “before” represents a functional but aesthetically challenged surface. The homeowner desires an update – a fresh, modern look – but may be constrained by budget or unwilling to undertake the disruption of a full countertop replacement.
The Epoxy Journey: From Drab to Fab (An Overview)
Achieving a professional-looking epoxy finish requires patience, precision, and preparation. While DIY kits are readily available, it’s not a slap-dash weekend project. Here’s a simplified look at the typical steps involved:
-
Preparation is Paramount:
This is the most critical stage. The existing countertop must be impeccably clean, free of grease, oils, and residues. Degreasing and cleaning are followed by sanding or scuffing the surface to create “tooth” – a slightly rough texture that helps the epoxy bond securely. Any damage like deep scratches or chips should be filled and sanded smooth. Finally, surrounding areas (cabinets, floors, backsplash, sink) must be meticulously masked off with plastic sheeting and painter’s tape – epoxy will drip.
-
Priming (Often Recommended):
Applying a compatible bonding primer or epoxy undercoat is crucial, especially over porous surfaces like wood or MDF, or slick surfaces like laminate and tile. This ensures proper adhesion and prevents issues like bubbles or uneven colour. Some primers are tinted to provide a base colour for the design.
-
Mixing the Magic:
Epoxy resin and hardener must be measured exactly according to the manufacturer’s instructions (usually a 1:1 ratio by volume) and mixed thoroughly for a specified time (often several minutes). Improper ratios or inadequate mixing can lead to soft spots or failure to cure properly. This is where pigments, metallic powders, or dyes are incorporated into separate batches to create the desired colours for the design.
-
The Pour and Artistic Spread:
This is where the transformation begins visually. The coloured epoxy mixtures are poured onto the surface, often in strategic patterns (lines, puddles, swirls). Tools like notched trowels, rollers, or even gloved hands are used to spread the epoxy evenly across the countertop and over the edges. Different techniques are employed to blend colours, create veins (using a stick or torch), or achieve specific effects.
-
Banishing Bubbles:
As epoxy mixes and cures, air bubbles inevitably get trapped. These must be removed for a flawless finish. A propane torch or heat gun, waved gently and quickly across the surface (without scorching!), lowers the epoxy’s viscosity momentarily, allowing bubbles to rise and pop.
-
The Curing Wait:
Patience is key. The epoxy needs to cure undisturbed in a clean, dust-free environment. While it might be tack-free in 24 hours, full cure (reaching maximum hardness and durability) can take anywhere from 3 to 7 days, or even longer depending on the product, temperature, and humidity. During this time, the countertops shouldn’t be used.
-
Finishing Touches (Optional but Recommended):
Once fully cured, some opt for a light sanding (with very fine grit) to remove any minor imperfections or dust nibs, followed by a clear flood coat of epoxy for added depth and protection, or a specialized urethane topcoat for enhanced scratch resistance and potentially a different sheen (like satin or matte).
Related: The Ultimate Guide to Crafting Stunning Epoxy Countertops: A DIY Deep Dive
The “After”: A Stunning Metamorphosis
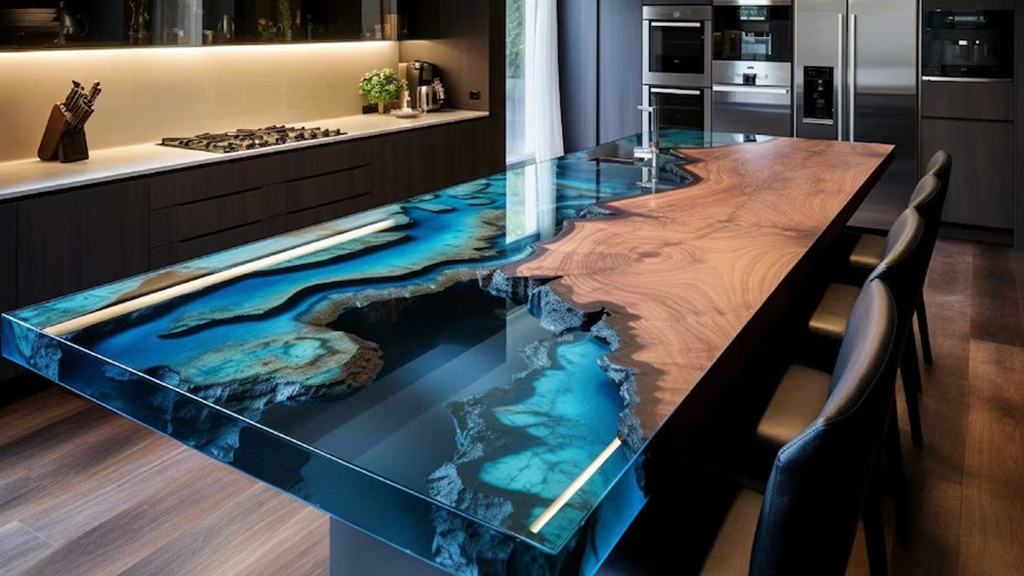
The results? Often breathtaking. Where there was once a dull, dated surface, there’s now a gleaming, seamless countertop that looks and feels substantial.
- High-End Aesthetics: The biggest draw is the visual transformation. Epoxy can convincingly mimic the luxurious look of Carrara marble, black granite, white quartz, or even create otherworldly “galaxy” or “ocean wave” effects. The high-gloss finish reflects light, making the kitchen feel brighter and more spacious.
- Seamless and Hygienic: The lack of seams or grout lines means there’s nowhere for bacteria, grime, or food particles to hide. Cleaning is as simple as wiping with a mild cleaner and a soft cloth.
- Durability: When properly applied and cured using a quality product, epoxy is highly durable. It’s resistant to moisture and, once fully cured with a food-safe rated product, is considered food-safe. It generally holds up well against scratches and impacts, although it’s not indestructible.
- Renewed Space: The impact goes beyond just the countertops. A fresh, modern work surface can elevate the entire kitchen or bathroom, making the whole space feel updated and more valuable. It’s often the catalyst that makes homeowners fall back in love with their kitchen.
Before & After Examples: Visualizing the Possibilities
Imagine these common scenarios:
- The 1980s Laminate: Before: Beige laminate with faint brown speckles, peeling corners, and a prominent burn mark near the stove. After: A brilliant white epoxy base with subtle, wispy grey veins mimicking expensive Carrara marble, cascading smoothly over a rounded edge. The kitchen instantly feels brighter, cleaner, and decades younger.
- The Grout-Stained Tile: Before: Square ceramic tiles in a dated peach colour, marred by dark, stained grout lines and a few chipped corners. After: A deep, dramatic black epoxy pour infused with shimmering silver and blue metallic powders, creating a “galaxy” effect. The surface is now perfectly smooth, incredibly easy to wipe down, and a bold design statement.
- The Scratched Butcher Block Island: Before: A beloved but heavily used maple butcher block island top, showing numerous knife marks, water rings, and a generally dull finish. After: A rich, semi-transparent grey epoxy pour that still allows some of the wood grain character to show through, sealed with a satin topcoat for reduced glare. It retains a natural feel but is now vastly more durable and water-resistant.
The Reality Check: Pros and Cons of Epoxy Countertops
Like any material, epoxy has its advantages and disadvantages.
Pros:
- Cost-Effective: Significantly cheaper than replacing with stone or quartz, especially if DIYed.
- Highly Customizable: Limitless design possibilities in terms of colour and pattern.
- Seamless Surface: Hygienic and easy to clean with no grout lines.
- Durable Finish: Resistant to moisture and reasonably resistant to scratches and impacts (quality dependent).
- Can Cover Existing Surfaces: Often avoids the need for demolition.
- High-Gloss Appeal: Creates a bright, modern, reflective surface.
- Heat Resistance: Many epoxies offer good heat resistance (some claim up to 500°F/260°C for brief contact), but using trivets for hot pans is always recommended.
- Food Safe: Once fully cured, most countertop epoxies are rated food safe (check product specs).
Cons:
- Messy & Difficult Application: Requires meticulous preparation, precise measuring/mixing, and careful application. Mistakes can be hard to fix.
- Long Curing Time: Countertops can be unusable for several days to a week.
- Potential Imperfections: Bubbles, dust nibs, or unevenness can occur if not applied correctly.
- Not Indestructible: Can be chipped or deeply scratched by heavy/sharp impacts. Cutting directly on the surface is not advised.
- Heat Limits: Prolonged exposure to high heat or direct contact with very hot pans can cause damage or discoloration.
- Staining Potential: While non-porous, strong pigments (like turmeric or red wine) left sitting for extended periods can potentially stain some epoxies. Quick cleanup is key.
- UV Sensitivity: Lower quality or non-UV-resistant epoxies can yellow over time, especially with direct sun exposure. Look for UV inhibitors.
- Strong Fumes: Application requires good ventilation and appropriate PPE (respirator) due to strong odors/VOCs during mixing and curing (though low/zero VOC options exist).
- Can Look Cheap (If Done Poorly): A rushed or poorly executed job can look like plastic rather than a high-end finish.
Related: Organizational Hacks: Declutter Your Kitchen with Clever Cabinetry Features
People Also Ask (FAQs)
Q1: How long do epoxy countertops last?
A: With proper installation using quality materials and good care, epoxy countertops can last 10 to 20 years, sometimes longer. Lifespan depends heavily on the quality of the epoxy, the installation process, and how well they are maintained.
Q2: Are epoxy countertops durable?
A: Yes, quality epoxy creates a very hard, durable, and scratch-resistant surface. They are generally more impact-resistant than laminate but can be scratched or chipped under force. They are also non-porous and resist moisture well.
Q3: Can you put hot pans on epoxy countertops?
A: While many countertop epoxies boast heat resistance (some up to 500°F/260°C), this usually refers to brief or accidental contact. It is strongly recommended to always use trivets or hot pads for pots, pans, or appliances that generate significant heat (like slow cookers). Prolonged heat can cause discoloration, softening, or damage.
Q4: Is epoxy cheaper than granite?
A: Generally, yes. Professionally installed epoxy typically costs $50-$150 per square foot, while granite ranges from $80-$150 per square foot, with high-end granite costing more. DIY epoxy kits ($100-$350+) offer significant savings compared to any professionally installed stone.
Q5: Do epoxy countertops scratch easily?
A: Quality epoxy is quite scratch-resistant for normal use, but not scratch-proof. Dragging heavy ceramics, cutting directly on the surface, or using abrasive cleaners can cause scratches. Minor scratches might be buffed out or hidden with polish, but deep scratches are harder to repair.
Q6: Are epoxy countertops hard to maintain?
A: No, they are generally low-maintenance. Clean with mild soap and water or non-abrasive household cleaners. Avoid abrasive pads or harsh chemicals. Wipe up spills promptly, especially highly pigmented ones.
Q7: Do epoxy countertops look cheap?
A: They can, but they don’t have to. The final look depends heavily on the quality of the epoxy product used and, crucially, the skill of the installer (whether DIY or pro). A well-executed epoxy job mimicking natural stone can look incredibly high-end and luxurious. A poorly done job with cheap materials can look plasticky.
Conclusion: A Transformative Option Worth Considering
Epoxy countertops offer a truly transformative solution for updating tired kitchen and bathroom surfaces without the hefty price tag of traditional replacements. The ability to customize colours and patterns is unparalleled, allowing homeowners to achieve a unique, high-end look – from stunning marble mimics to bold artistic statements. The resulting seamless, glossy, and durable surface is both beautiful and practical.
However, achieving that perfect “after” photo requires acknowledging the “during.” The process demands careful preparation, meticulous execution, and patience during curing. It can be messy, and there’s a learning curve, especially for complex designs. While DIY is possible and cost-effective, it’s not foolproof, and hiring an experienced professional might be worthwhile for guaranteed results. Weighing the incredible aesthetic potential and cost savings against the application challenges and maintenance considerations (like using trivets) is key. For many homeowners seeking a dramatic, budget-friendly countertop makeover, epoxy represents an exciting and viable path to breathing new life into the heart of their home.